Showing posts with label Cakes. Show all posts

Tuesday, September 15, 2015

Pound Cake


The first ever thing I baked and that also at the tender age of 10 years was a pound cake. My younger sister and I did it together in fact with the help of our mom. She gave us all the ingredients along with the measurements and there we go, both of us got busy on one long hot day of our summer vacations and thoroughly enjoyed that activity :) My sister measured out all the ingredients under my Mom's supervision and I was the incharge of the mixing department; I was operating the stand mixer. She brought all the ingredients to me one by one and I mixed the batter with the help of that machine. The batter was poured into a greased loaf tin and in it went to the oven to get baked and both of us waited anxiously till its done and couldn't wait it to be ready :) My Mom obviously was doing that step and the moment it came out of the oven, looking fluffy and spongy, both my sister and I exclaimed with joy and wanted to decorate it right away. My Mom then gave us some grated chocolate to sprinkle it on top of the warm cake and I remember, both of us said that we won't cut it till our Dad comes back home from work and look at our piece of art :) My Dad has always been a person who compliments genuinely and always appreciates and encourages; whether it is on our achievements, dresses or cooking, he'd always tell us that you did or look best. So how could he not liked the cake that my sister and I baked for the first time :) He generously praised our attempt and enjoyed a slice of it with a cup of his evening tea :) I wish my Mom took a photo of that cake with the camera as there were no mobile phones back in the day or else I would have taken it myself and would have posted it on the social media like the kids now-a-days do :P But considering the strictness of my Mom, no way I would have owned an iPhone if I was 10 today and Facebook would have been a far-fetched idea! I am honestly glad about that. I really am quite happy about my childhood and all the fun we used to have back then :) But times change and so does the behaviors and parenting styles too maybe. I will know that once I become a parent in future, In Sha Allah (God willing) :)


So back to the cake. From that day onward, my sister and I have made cake together a number of times but she being the studious one and although has a little interest in baking but has never been passionate about it the way that I have been. She's into a medical profession now so, do not get time to even go into the kitchen and I took hold of that department entirely as I am the baker at the house :) Whether its a plain pound cake or a fancy birthday cake, I'm the one who makes it at home oh, and I still use those same loaf pans that my Mom owns and I baked my first cake in :) I shall be sharing more of my cakes in the future posts but I have already posted a recipe of my Victoria Sponge Sandwich Cake that you can find the recipe of here.
Pound cake, which is often referred to as plain cake, has gotten it's name cause of all the main ingredients used in making this cake weighing 1 pound. The cake recipe that is of my Mom's was in tablespoons instead of the cups and she used butter. Now, I converted them into the cup measurement and replaced butter with the oil as I got more into practice of baking and got familiar with the right texture of the perfect pound cake. You can use any oil such as corn, sunflower, canola, coconut and even light olive oil. Oil makes the cake moist and light and the texture doesn't come out dense also but if you want, you can use butter by all means; no hard and fast rule but a personal preference mainly :) I've tried using all of them at different times. We never buy a cake from the bakery unless it was extremely necessary or I was not around to bake one :D I even use a homemade pound cake in the desserts such as Trifle and feel that the texture and flavor of the homemade is always better than the store bought one. Check the recipe of this classic English dessert, Trifle here.

Let's get some baking Unleashed today! :D


Pound Cake (Plain Cake)

Ingredients:

Plain Flour: 1 1/2 cups 
Eggs: 3 medium sized (at room temp)
Caster Sugar: 1 cup 
Oil: 1 Cup (you can use butter if you like but I use oil in my cakes)
Baking Powder: 2 tsp 
Salt: 1/4 tsp.
Vanilla Extract or Essence: 1 tsp.
Milk: 1/4 cup

Method:

  1. Preheat the oven at 180 C/350 F/Gas Mark 4.
  2. Grease and flour a 9 x 4 1/2" loaf tin/mold. Set aside.
  3. Sift the flour and baking powder together and put aside.
  4. In a stand mixer's mixing bowl or any other regular medium sized mixing bowl, beat together sugar, oil, salt and vanilla essence with the help of an electric beater on a medium speed.
  5. Once mixed well, add eggs one at a time beating well after each addition.
  6. Now add milk and flour and beat on slow speed till all of the flour is incorporated. Do not over beat.
  7. Pour the batter into the greased mold and bake into a preheated oven for 30 mins or till the cake tester/skewer/knife inserted into the middle of the cake comes out clean.
  8. Let it cool down a bit before taking it out from the mold and cooling it completely on a wire rack. 
  9. Cut into slices once cools down and serve.
  10. Keep it in an airtight box. Will stay well up to 2,3 days.
Makes 1 cake


That's all bakers! :) Baking time can always be adjusted according to the type of your ovens. I hope you enjoy making and eating them. Until next time, keep sharing the goodness of this greatest blessing, that has been bestowed in abundance upon us the lucky ones, with the less fortunate ones.
Thank you and please remember in your Du'as/prayers! :)

*Not be duplicated, rewritten or published without permission- Thank you! 


Friday, September 11, 2015

Trifle


Trifle is an English dessert made by layering cake, custard, fruits, cream and jelly/jello. It is one of the easiest and commonly prepared desserts, not just in this region but all over the world. Trifle is also served at different celebratory and religious occasions along with the other traditional sweet dishes like Gajjer ka Halwa and Zerda. A great choice to have it anytime of the year, I must say and its a family favorite as well. My mother has always prepared it not just for us over the weekend but even for the dinner parties we'd have at home for friends and family. Growing up, whenever we had Chicken Biryani for dinner, she used to make Trifle for dessert on the weekends. Later I started helping with the preps and loved setting the layers. She'd do the basic preparations and the rest was my job :D We always use homemade Pound Cake in this gorgeous dessert and I took on the task of baking it when I grew a little older. I have shared the recipe of it in my next post. Please click on the highlighted text.
The best thing about this dessert is that it is visually very attractive cause of the different colors of the layers showing through the transparent glass bowls/dishes and for that reason also it is a favorite of almost everyone and is a center of attention at your dinner table :) 


I am a dessert lover and I love and enjoy making desserts too. I've learnt making it from my Mom but she has taken a backseat and I make it now :) The first time I prepared it on my own was for a dinner we organised for my newly wed aunt and her husband and I remember being too happy and proud of my creation that I was not able to wait till the dessert would be served and that happiness and pride was doubled when I received so many compliments from everyone esp. the guests of honor! :D

I like using seasonal fresh fruits in it rather than the canned mix fruit as the fresh fruit really enhances the flavors of this refreshing dessert. It's quite pleasant and thoroughly enjoyed during the hot weather and for that very reason, I prefer making it when it's hot here. Last time when I made it for my family, I used fresh cherries and kiwis along with bananas and some canned pineapple chunks; that's the only canned fruit I use since, fresh pineapples are not that easily available here. I also like to make individual servings of Trifle as its more convenient and looks pretty too. Cake and custard both can be used store bought but I'll also be sharing how to make custard at home by using custard powder. Its a quite diverse dessert so feel free to use whatever fruits custard flavor you want and treat your family and friends with some prettiest and tastiest desserts :)

Let's get some sweet-tooth Unleashed today! :D


Trifle

Ingredients:

Milk: 1 liter+1/4 cup
Custard Powder: 2,3 tbsp 
Sugar: 4,5 tbsp.
Pound Cake: 1 (sliced)
Mixed Fruit: 2 cups (pineapple, bananas, kiwi, pitted cherries or any other of your choice, cut into pieces)
Heavy Cream: 250 ml
Jelly/Jello: 2 packs (green and red prepared according to the instructions on the pack and cut into cubes)
Pitted Fresh Cherries , Kiwi Slices and Jelly/Jello Cubes: for garnishing.

Method:

  1. Boil milk and sugar together in a heavy-bottomed pot. Dissolve the custard powder in the 1/4 cup of the milk and slowly pour it into the boiling milk. Let it thicken over medium flame. Take off the stove, cover with the lid and let it cool down before using.
  2. Mix all the cut fruit with the cream in another bowl and keep it aside.
  3. Take a large and tall walled glass bowl and pour some custard into the base of it.
  4. Now place some cake slices over the custard in a way that they make a second layer by covering it completely.
  5. Next, put some of the fruits mixed with the cream over the top of the cake layer and spread it evenly.
  6. Now put some green and red jelly over the fruit and cream layer.
  7. Repeat the layers according to the height of your serving bowl.
  8. Cover with a cling wrap and refrigerate to chill it completely.
  9. Garnish with some fresh cherries, kiwi slices and jelly/jello cubes before serving.
  10. The same method can be followed in preparing individual servings.
  11. Serve chilled.
Serves 6

That's all dessert fans! :) The amount of ingredients can always be adjusted according to your taste and desire. I hope you enjoy making and having it. Until next time, keep sharing the goodness of this greatest blessing, that has been bestowed in abundance upon us the lucky ones, with the less fortunate ones.
Thank you and please remember in your Du'as/prayers! :)

*Not be duplicated, rewritten or published without permission- Thank you 


Thursday, September 3, 2015

2 Min. Fudgy Mug Brownie


Now-a-days, everyone is in a hurry and want to do everything in a jiffy. Not many of us have time and most importantly, patience to spend hours in the kitchen to prepare our favorite meals esp. desserts. For that reason, many smart people out there have created shortcut recipes to make the favorite desserts for those times specially, when you're craving for something sweet and neither have time nor the patience to make and later to wait long to have it. I'm one of those impatient people too, who would crave for a dessert at an odd hour and have to have it at that very moment too hence, the recipe of this 2 Min. Fudgy Brownie came upon me during one of those bad craving moments. 
I was working late at night and at around midnight, I had a sudden urge to get up and make a quick brownie in the microwave and satisfy that stubborn craving that wasn't leaving me at peace for a couple of days. Now, you'd find thousands of mug cake recipes on the internet easily and that's something which almost everyone has tried making at least once by now. I've read and watched and even tried a lot of mug cake recipes but I didn't want any of that spongy, leathery stuff that goes hard upon cooling down a bit (based on personal experience) Plus, for not being an egg fan, I didn't want it in mine as adding one whole egg into a single serving of cake is something that's not a comfortable idea for me besides, I wanted a hot, ooey-gooey, fudgy brownie and was not finding what I was looking for. I looked at some ideas on Pinterest but almost all of the Pins I came across were of the recipes that either added Nutella or peanut butter or banana in them. I didn't want any of those ingredients in mine so the quest was getting tougher and I was getting more eager to whip up something of my own. 


I then checked my pantry and took out the simplest ingredients needed to create my quick-dream-brownie. Mixed Cocoa power, plain flour, brown sugar, white sugar, a pinch of salt and bi-carb of soda and then added just 3 wet ingredients; water, oil and a drop of orange essence (because I wanted a hint of orange flavor in it) to this dry mix. Mixed until everything was just well combined, microwaved it for 2 minutes and Ta Da! A delicious looking and divine tasting brownie was ready for me to savor! I made the brownie batter in a bowl and let it bake in the same bowl and once it was ready, just sprinkled some desiccated coconut on top and indulged myself into the goodness of this wonder I created just under 5 minutes! 


I have made it a number of times ever since and have topped it with different toppings such as my homemade orange marmalade, banana slices, icing sugar, chocolate sprinkles and again with the desiccated coconut. The first fudgy brownie I made was enough for two people that I shared with my sister cause no matter how greedy I could be, I still feel guilty and stopped myself from eating that sinful dessert all by myself therefore, I halved the recipe for the single serving later. I have even tripled the original recipe for my whole family yesterday and both my Mom and Dad really loved it! My Dad is really picky about his food choices so if he liked it, I can vouch for its deliciousness with full confidence ;) One of my sisters ate this brownie cold and was singing its praises for long! So folks, I'm sharing with you the secret to making a wonderful brownie in no time not just for yourself, but serve it to your guests too with some ice-cream and get ready for future requests ;)

Let's get some brownie making Unleashed quickly! Shall we? :D


2 Min. Fudgy Brownie in a Mug

Ingredients:

All-Purpose Flour: 4 tbsp.
Unsweetened Cocoa Powder: 2 tbsp.
Brown Sugar: 2 tbsp.
Granulated White Sugar: 2 tbsp.
Baking Soda: a pinch
Salt: a pinch
Oil: 2 tbsp
Water: 4 tbsp
Orange Essence: a drop (can use Vanilla instead)
Desiccated Coconut, Icing Sugar, Chocolate Sprinkles, Orange Marmalade, Bananas: For garnishing.
Vanilla Ice Cream: 1 scoop (to serve with)

Method:

  1. Mix all the dry ingredients in one coffee mug and set aside.
  2. Add oil, water and essence to the dry ingredients and mix everything together.
  3. Microwave for 2 minutes. The time can vary depending on the power of your microwave but start with 1 minute and increase the time if its not cooked in 2 minutes.
  4. Take out and garnish with the topping of your choice and serve. 
  5. Can be served hot with vanilla ice-cream or let cool completely if you want to eat it cold.
Makes 1 serving

That's all dessert lovers!:) Baking time can always be adjusted according to the 
power of your ovens. I hope you enjoy making and eating it. Until next time, keep sharing the goodness of this greatest blessing, that has been bestowed in abundance upon us the lucky ones, with the less fortunate ones.
Thank you and please remember in your Du'as/prayers! :)

*Not be duplicated, rewritten or published without permission- Thank you! 


Saturday, August 22, 2015

Mango Cheesecake


This is quite amazing and interesting at the same time that I am a popular baker amongst my friends and family yet, I have posted just one cake on my blog so far but I have shared recipes of some other baked goods like muffins, rolls, cookies and stuffed bread that you can check the recipe of in my previous posts (click on the highlighted text to get the recipes) There is a valid reason behind not doing more cake posts yet which is that, I have been covering seasonal recipes mostly but you will see a lot of baking; cakes and muffins in the future, In Sha Allah (God Willing)

The recipe that I am going to share today is something that I tried both my hand at making as well as for tasting it for the first time. It is a cake, yet a no-bake one and a very delicious, rich and decadent dessert that almost everyone loves and is known as a Cheesecake! 


I've eaten a baked cheesecake many times and it is one of my most favorite desserts but unfortunately, I've never tried making it at home ever besides, in this scorching heat, I am avoiding turning my oven on and then sweat away while trying to prepare some baked goodies! Hopefully, as soon as the weather gets a little mild, I'll get my baking mode on again but I do have a few recipes saved in my archives that I shall be posting on my blog in future.

Since cheesecake is also a family favorite so I thought to try making it with mangoes but keeping in mind the heat index, I wanted a no-bake version of it. I then looked for different recipes on the web and came up with a recipe by making a few exceptions to the ones I liked. I used fresh Pakistani mangoes for this recipe but you can use the canned pulp in place of the fresh mango's puree. Another great thing about this recipe is that you can use any other fruit you like instead of mangoes to make your favorite fruit flavored cheesecake. You can make this cake into single servings too if you like. The wonderful thing about this dessert is that my parents loved it though they are not a fan of these kind of cakes so, I was one happy being! This recipe has undoubtedly become another family favorite now :)

Get your dessert cravings unleashed today! :D


Mango Cheesecake 

Ingredients:

Base:
Digestive Biscuits/Graham Crackers: 20-24 
Butter: (softened) 1/2 cup/113 gms/4 ounces 
Granulated Sugar: 4 tbsp.

Filling:
Mango Pulp/Puree: 1 cup
Cream Cheese: 8 ounces/225 gms
Heavy Whipping Cream: 250 ml/1 cup
Gelatin Powder/Agar Agar Powder: 3 tbsp.Lemon Juice: 1 tbsp.

Topping:
Mango Pulp/Puree: 1 cup
Gelatin Powder/Agar Agar Powder: 3 tbsp.

Method:

  1. Put the biscuits/crackers along with the sugar into a chopper and chop them into fine crumbs. 
  2. Add softened butter to the crumbs and put this crumb mixture into a 9 inch round spring-form tin.
  3. Press down the crumbs in to the base of the cake tin either with the help of the back of a spoon or a bottom of a glass. Let it reach up to an inch around the walls of the tin. Refrigerate till set. 
  4. Whip the cream with a help of a stand mixer or a whisk till stiff peaks are formed. Set aside.
  5. In another bowl, add the softened cream cheese and beat until smooth. Add lemon juice and mix well.
  6. Prepare the gelatin/agar agar powder according to the instructions on the package. 
  7. Add whipped cream and the mango pulp/puree to the cream cheese mixture and mix well. 
  8. Add the gelatin/agar agar to the filling mixture and mix well.
  9. Take out the prepared base tin from the refrigerator and pour the cream cheese mixture over it. Level it with the help of a spatula. Cover with a cling wrap and refrigerate until set. Takes about 6-8 hours.
  10. Once the cheesecake sets in the fridge, prepare the topping by mixing mango pulp/puree with the prepared gelatin/agar agar. 
  11. Take out the cheesecake and pour the topping over it. Cover with the cling wrap and refrigerate again till sets. Better to leave overnight in the fridge before serving.
  12. At the time of serving, loosen the sides of the cake with a knife by running it along the edges against the sides of the pan. You can wet the knife with hot water to do this step more easily.
  13. Remove the sides of the spring-form pan and gently lift away the side. Slide the spatula under the pan bottom and keeping sliding as far as possible to loosen the base from the cake. Remove it carefully. This step can be left out.
  14. Gently lift the cake and place it onto the serving platter.  
  15. Serve chilled.
Serves 8

Note: add sugar, according to your taste, to both the filling and topping if you want your cheesecake sweet.

That's all Cheesecake fanatics! :) The amount of ingredients can always be adjusted according to your taste and desire. I hope you enjoy making and having it. Until next time, keep sharing the goodness of this greatest blessing, that has been bestowed in abundance upon us the lucky ones, with the less fortunate ones.
Thank you and please remember in your Du'as/prayers! :)

*Not be duplicated, rewritten or published without permission- Thank you!


Saturday, May 9, 2015

Victoria Sponge Sandwich Cake


The name suggests that it is a royal dessert, which it sure is and is said to be a favorite cake of Queen Victoria who fancied a slice of this cake with her afternoon tea, wow what luxury. But you don't need to be a royalty yourself to enjoy a slice (or two) of this delectable cake but can very much relish it in the comforts of a common-man's abode; you can easily make it at home as did I :D

To be honest with you, I didn't know about this cake until very recently or shall I say that I didn't know that the sandwiched cake we so merrily savored is actually known by the name of your very own Victoria Sponge. Upon knowing that, I thought why not to make it with more gusto and show off a bit that even we have a taste to devour, ah pardon me, have a penchant for some English treats, oh dear, how classy! (I've started to hear myself speak in British accent while typing these lines :P Thanks to my dearest friend A!)

On a more serious note, this cake is really very easy to make but you need to keep a few simple things in mind while preparing it to get the original classic texture and flavor of the Victoria Sponge. The guests can be effortlessly impressed by serving this cake at afternoon tea/Hi-tea or the friends will swoon at the sight of this cake layed at your Sunday brunch table. Lets get more classy by bringing it to the family picnics and enjoy this cake with the combination of gorgeous Spring/Summer time fruit, fresh strawberries along with the lusciousness of thick cream. Mmmm doesn't that all sound so tempting? It sure does!

Traditionally raspberry or strawberry jam is used between the layers of this cake
The key to get the right, light-as-the-air texture of the sponge is to use Flour, eggs, sugar and butter in the same amount/weight and all the ingredients used should be at room temperature. Whenever you make your cake, muffins or any other type of cakes, always remember this tip to achieve best results. I use oil in my cakes though and never feel that the replacement does any compromise on the flavors but you can use butter by all means. You can also bake the layers into two cake moulds to get better results but I baked a single cake and then sliced it in to two layers as I have just one round mould (yeah, need to do some shopping soon to upgrade my baking supplies)

I reckon, this cake will become a family favorite easily and will surely become one of your most requested desserts. so get ready to hear 'Blimey, this is homemade?!' pretty soon! :D 
Oh, since this is an English dessert therefore I'd like to dedicate it to my very British friend, A! Hope you like it AYM! :D

Lets get Bonkers, or in other words, let some baking skills get unleashed today, cooks! :D


Victoria Sponge Sandwich Cake

Ingredients:
Eggs: 4 medium sized 
Butter/Oil: 250 gm/250 ml/1 cup
Caster Sugar: 250 gm/ 1 cup
Flour: 250 gm/ 2 cups
Baking Powder: 2 tsp
Vanilla Essence: 1 tsp
Salt: 1/4 tsp
Milk: 2 tbsp
Powdered or Icing/confectioner's sugar: for dusting over the cake
Whipping Cream: 200 ml
Fresh Strawberries: 1 cup (washed, hulled and sliced into halves)
Strawberry Preserves/Jam: 1/2 cup

Method:
  1. Prepare a 9 inch round cake tin by greasing and dusting it with flour or two 9 inch cake moulds. Preheat the oven at 180C/350F/Gas-Mark 4.
  2. Sift together the flour and the baking power and keep aside.
  3. Beat together the sugar and oil on high speed with the help of an electric beater or a whisk until well blended. If using butter then cream together both till pale in color. 
  4. Add  the eggs one at a time while beating for a few seconds after each addition. 
  5. Add salt and vanilla after the final addition of the eggs and beat lightly.
  6. Now add half of the flour and baking powder sifted together and beat for a few seconds on medium speed. DO NOT over beat or else the cake will go hard. repeat the same step with the rest of the flour.
  7. At this stage the cake batter should be dense enough to not drop easily if tried to drop with the help of a spatula or not runny that it gets of a flowy consistency but should make thick ribbon like shape upon dropping. If not, then add 2 tbsp of milk. Otherwise omit adding it altogether.
  8. Pour the batter into the mould(s) and level it with a help of a spatula for an even baking and rising.
  9. Bake into a preheated oven for 25-30 mins or till the cake(s) turn golden brown from the top, springs back upon lightly pressing into the middle or a tester inserted into the center of the cake comes out clean.
  10. Let the cake(s) cool down a bit before unmoulding it (them) onto a wire cooling rack.
  11. Let cool completely before slicing the cake into layers (if using one cake) and assembling.  
Assembling the cake:

  1. Slice the cake into two layers if you've baked one cake otherwise place one cake layer onto the cake stand or a serving platter to make things easier for you.
  2. Spread the preserves/jam over the the first layer. If using preserves then mash the fruit chunks with the help of a fork to smooth down it a little.
  3. Whip cream to soft peaks. You can add some sugar to sweeten the cream a bit if desired. Put dollops of the whipped cream over the jam layer. Try not to spread it as it will spread out on its own after the second cake layer is placed on the top.
  4. Place the strawberry halves all over the cake in a decorative way so that they can be seen placed between the layers.
  5. Put the rest of the cream over the strawberries and place the second cake layer on top.
  6. Put some powdered or icing sugar in a sifter and sprinkle all over the cake.
  7. Serve and enjoy with your friends and family.
Serves 8-10


Beat sugar and oil together

Add egg and vanilla


Add eggs one at a time

Beat gently after each addition


Add flour


Gently beat in all the flour


Prepare the mould
Pour in the batter

Bake till done

Cut when cools down

Layers

Use chilled cream

Beat till stiff peaks forms

Cut the strawberries

Homemade preserves

Spread over the 1st layer

Top with the whipped cream

Place strawberries

Some more

Put the 'lid' on
Dust icing sugar

Cut a huge slice

Enjoy! :D

That's all cake lovers! :) Baking time can always be adjusted according to the type of your ovens. I hope you enjoy making and eating them. Until next time, keep sharing the goodness of this greatest blessing, that has been bestowed in abundance upon us the lucky ones, with the less fortunate ones.
Thank you and please remember in your Du'as/prayers! :)

*Not be duplicated, rewritten or published without permission- Thank you! 


Tuesday, March 24, 2015

Wholewheat Banana Crumble Muffins

Muffin is a healthy version of a cupcake; I'd say that's the only difference I find in between the two. I might be wrong but I have always made them as a healthier alternative of cupcakes and that also with wholewheat, thus I like to say that's the only major difference I see.

They're moist as well plus you can add any fruit (fresh/frozen) in the batter, less fat, sugar and egg than the regular cupcakes (hmm sounds good), do not need a mixer or no beating involved (now that's getting better) and also no need to worry if you've ran out of paper liners/cases. You can directly spoon the batter into the greased and floured muffin tray and in they go to get baked, yaay! Bonus point: they can be served warm therefore, no point waiting till these goodies cool down and your patience is about to go unleashed :P gobble them down with a hot cuppa and you're good to go. Oh and an extra bonus point: we're making them with the wholewheat flour without compromising on the flavors, yipee! :D

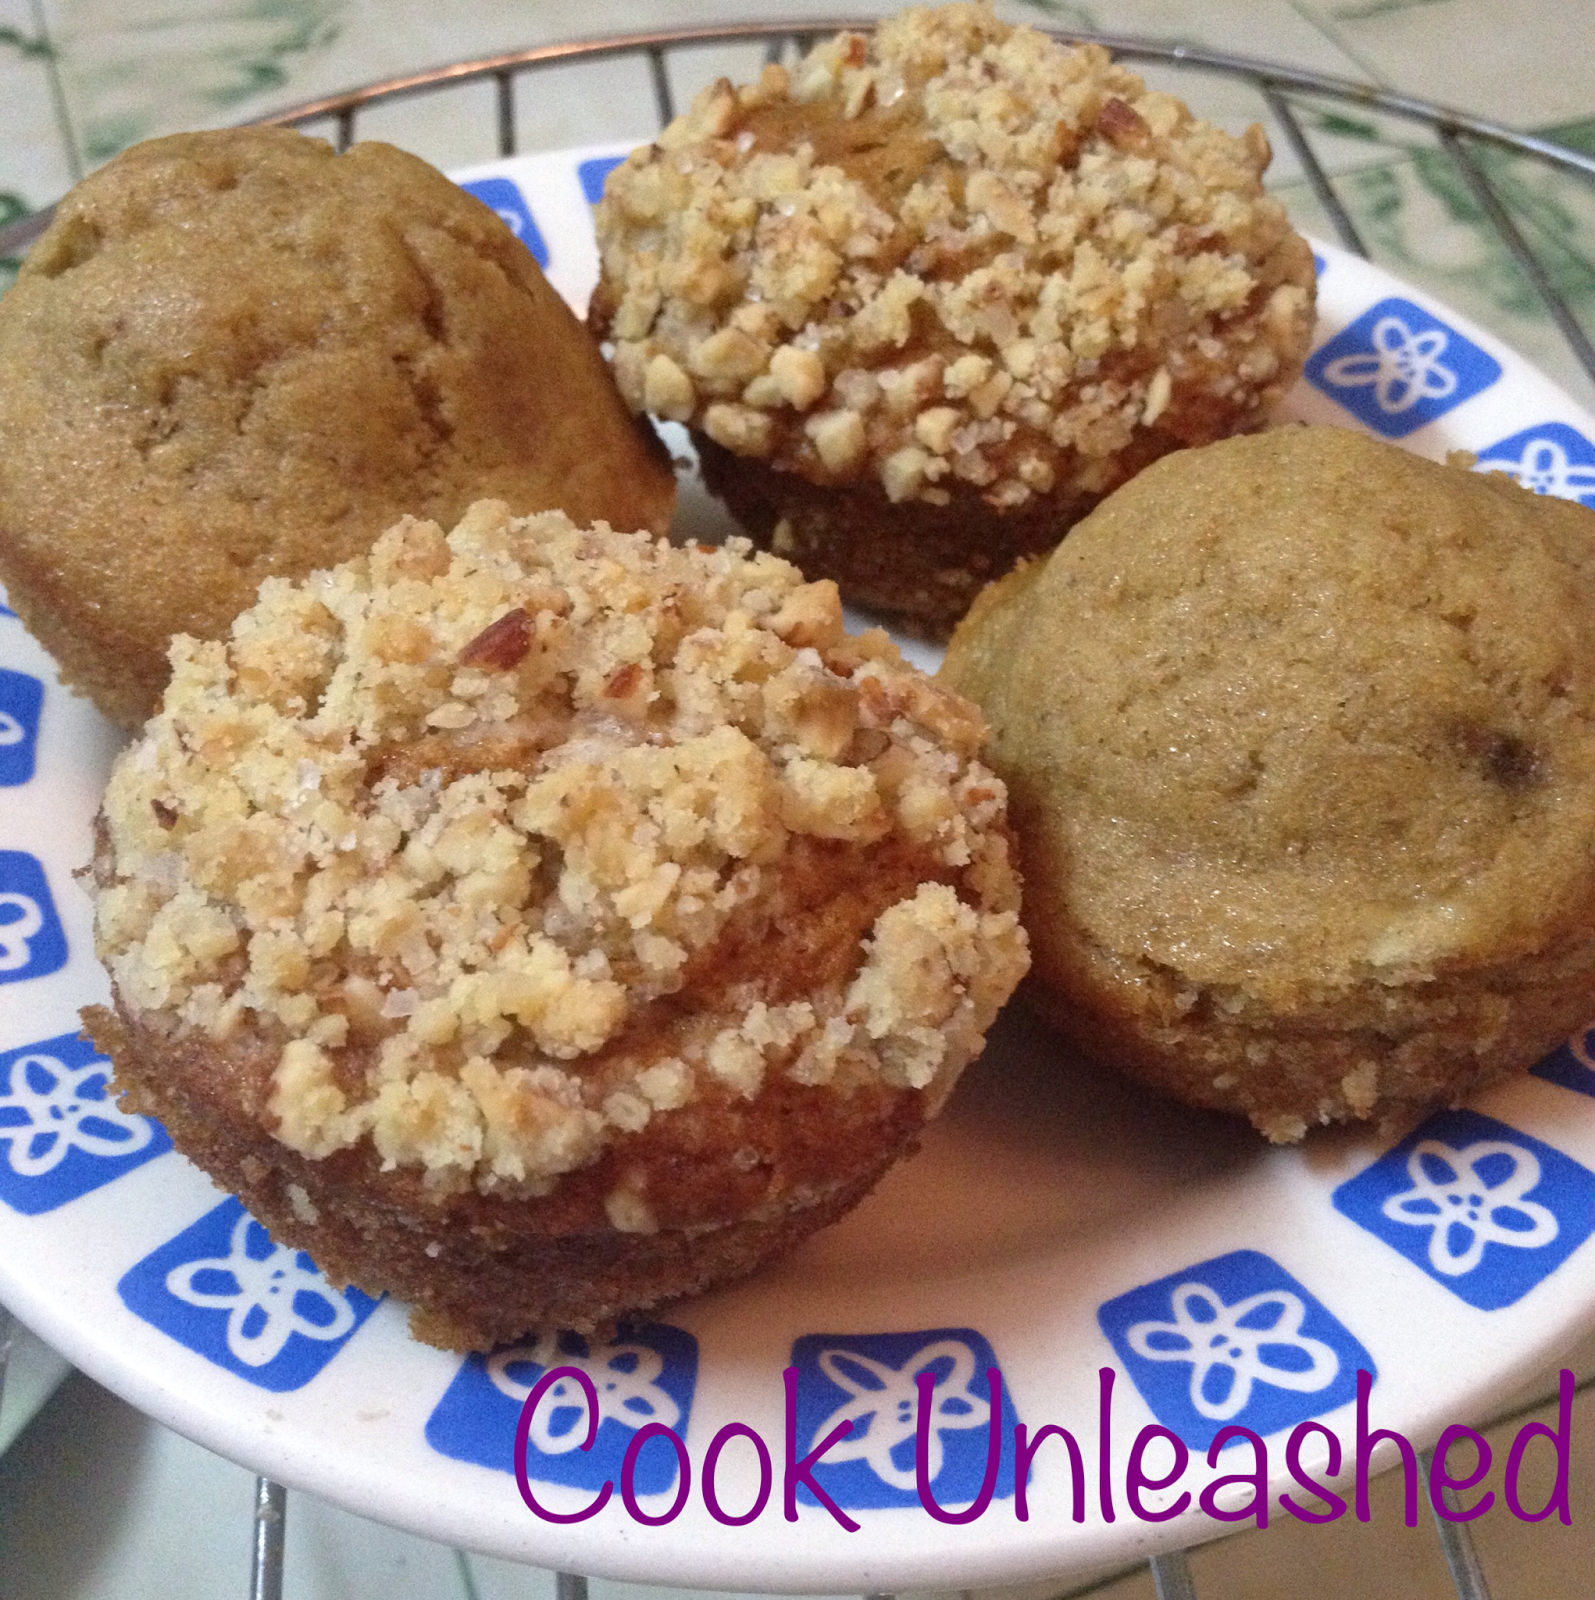
Fresh muffins, just out of the oven

Muffin is one of my most favorite treats not just for breakfast but for snacking too. As a kid, my Mom used to give us a muffin with a glass of cold milk as an evening snack and also, it was one of my school lunchbox's items. They used to be bakery bought that my Dad would bring for us along with other delicious treats from our favorite bakery, Saghar in the K.S.A on his way back from work :) A sandwich, one fruit and one little treat with a pack of Saudi Haleeb milk or a pouch of Capri Sun or a box of Suntop juice in my red lunchbox that had Sesame Street characters printed on it, was my real treasure. I'd save the treat to eat in the bus on my way back home after school ended and it really comforted my hunger pangs temporarily while on the 45 min commute back home.


You can even make without the crumble top

Coming back from the memory lane :) as I grew up and got better at baking, a bit more adventurous and a little health conscious, I thought of making them at home with whatever experimenting of the flavors I could think of and used wholewheat flour instead of the regular all-purpose one. Not only me, but everyone who had them and is a fan of my baking, loved them! :D one of those many experiments is Banana Muffins and I also made wholewheat Chocolate Muffins (another upcoming post) I then tried to be a little more adventurous and made these muffins more fancy by adding the crumble on top. To give this crumble muffins a breakfasty touch, I then added some rolled oats in the topping. Exibit-a, here you're reading a post on them, Ta Da!

Get ready to unleash some of the baking aroma in your kitchen, Cooks! :D


Wholewheat Banana Crumble Muffins

Ingredients:

Wholewheat Flour: 2 cups
Bananas: 3 (large, ripe and mashed. Add 2,3 drops of lemon juice to prevent browning) 
Egg: 1
Brown Sugar: 3/4 cup (you can use white too or use half white and half brown) 
Vegetable Oil: 1/2 cup (can use Olive oil or even butter if you like) 
Butter Milk: 1/4 cup (or take 1/4 cup milk at room temp, add half a tsp of white vinegar and let it stand covered for a few minutes before using)
Baking Powder: 1 tsp.
Baking Soda: 1 tsp.
Salt: 1/4 tsp.
Cinnamon Powder: 1 tsp.
Sultanas/Raisins: 1/4 cup (optional) 

Topping:
Flour: 2 tbsp.
Rolled Oats: 2 tbsp.
Brown Sugar: 1/3 cup
Chopped Nuts: 1/3 cup (any of your choice, can use desiccated coconut too)
Cinnamon Powder: 1 tsp.
Butter: 2 tbsp. (cold)

Method:
  1. Grease and flour a 12 cup muffin pan and preheat the oven at 180 C/350 F/Gas-mark 4. 
  2. In a clean and dry bowl, mix all the dry ingredients like flour, baking powder, baking soda, sugar, salt, sultanas and cinnamon powder. Keep aside.
  3. In another bowl, lightly whisk an egg with the oil/butter and the butter milk. Add the mashed bananas.
  4. Now lightly fold all of the dry ingredients into this wet mixture. DO NOT beat or the muffins will become hard. Just fold gently until the mixture gets wet. Do not worry if its still lumpy 
  5. Mix all the dry topping ingredients and cut the cold butter into them. Mix with the help of your finger tips till the mixture resembles bread crumbs. Keep aside.
  6. Spoon the batter into the muffin cups, do not over fill. Just fill 3/4 of the cup.
  7. Sprinkle the topping on all of the muffins.
  8. Bake in a pre-heated oven for 30-35 mins or till the tops are golden brown and the tester inserted into the center of the muffins come out clean.
  9. Let stand for 10 mins before removing the muffins to cool on a wire rack.
  10. Serve warm or at room temp. with tea/coffee/milk.

      Makes 12

That's all, fellow bakers! :) Baking time can always be adjusted according to the type of your ovens. I hope you enjoy making and eating them. Until next time, keep sharing the goodness of this greatest blessing, that has been bestowed in abundance upon us the lucky ones, with the less fortunate ones.
Thank you and please remember in your Du'as/prayers! :)

*Not be duplicated, rewritten or published without permission- Thank you!