Thursday, May 21, 2015

Oven-Baked Chicken Tikka/Tandoori Tikka


As a kid I hated chicken! Yes, you heard me right; I couldn't even stand the sight of it! And why was that? I had a fever once as a little girl and during that period of sickness, I started loathing this meat; the reason is not clear to me still but the thought of it used to give me a sick feeling. My parents put their utmost efforts to bring me back to liking it but, it was of no avail. It was after the umpteenth try that my Dad won the battle and what did he try feeding me that won my heart? Yep, you guessed it right! The scrumptious piece of Chicken Tikka; He put one morsel into my mouth and the burst of flavors got me hooked on it for life! So folks, that's how I found my love for chicken, by Chicken Tikka (if I don't sound like Ted from 'How I met your mother' :P)


The Chicken Tikka that my Dad fed me was barbecued but not every day you can fire up your barbecue grill esp. if you are living in the parts of the world where you don't get to see the sun often or the places where sun is too much in love with us (its 42 C in Lahore at the moment!) Therefore, we have used oven as a substitute to prepare this Tikka, whenever we wish to and made life easier for us. I can assure you that you'd not find any big difference in between the two ways of preparing this palatable chicken dish except that the one prepared over the coals would have that distinctive aroma and flavor that the oven-baked would lack. We can however overcome that 'foible' by simply placing a burning coal emanating the smoke, over the cooked Tikkas for a few seconds to infuse in that specific barbecued flavor and Voila, no one can say that these chicken pieces are baked and not BBQued.

This is one of my Mom's favorite dishes too and trust me she's very choosy when it comes to favorites. She won't admit it but she even applies the same rule while picking a favorite amongst her children. Although we very well know who that is but let's keep it a secret by saying all of us are her favorite (my mom's usual answer :P) So, on Mother's day I thought to specially prepare it for her along with Roasted Potatoes and for dessert I made Vanilla-Brownie Surprise cake (recipes will be in my future posts, In Sha Allah- God willing) 
She loved and all of us were delighted, Alhumdulilah (praise to Allah) :D

I used chicken cut into 16 pieces but you can use chicken cut into 4 or 8 pieces too to give that authentic Tikka look. The same marinated chicken can be prepared over the coals or the marinated boneless chicken threaded onto the wooden skewers can be baked instead, the choice is yours. So let me share with you my Mom's favorite Oven-Baked Chicken Tikka which is our family favorite and is certainly going to become your's very soon too :) 

Let's get some oven-baked bbqueing unleashed in your kitchens today! :D


Oven-Baked Chicken Tikka

Ingredients:

Chicken: 1 1/2 kg/2.20 lbs (cut into 16 or 8 or 4 pieces)
Yogurt: 1/2 cup (beaten)
Lemon Juice: 1/4 cup
Ginger Powder: 1 tsp (or 1 1/2 tsp of fresh ginger paste)
Garlic Powder: 1 tsp (or 1 1/2 tsp of fresh garlic paste)
Salt: 1 tbsp
Chili Powder: 1 1/2 tsp 
Turmeric Powder: 1/2 tsp
Coriander Powder: 1 tsp
Garam Masala Powder: 1 tsp
Cumin Seeds: 1/2 tsp
Red Food Coloring: a pinch
Meat Tenderizer: 1/4 tsp (optional) 
Mustard Oil: 1/4 cup (can use vegetable or olive oil instead)
Onion Rings: for garnishing

Method:

  1. Prick the chicken pieces with the help of a fork. If using 8 or 4 pieces portions, then mark deep slits on each chicken portion. Put them in to a wide mixing bowl.
  2. Beat the yogurt and add all the spices along with the lemon juice and the meat tenderizer (if using) and mix well.
  3. Pour the prepared marinade and the oil over the chicken pieces and mix well so that all of the marinade evenly coats over all the pieces.
  4. Now cover the bowl with its lid or with the help of a cling film and refrigerate for at least 6-8 hours prior to cooking. Overnight works best.
  5. Take out from the fridge about 15-20 mins before you start preparing for cooking.
  6. Preheat the oven at 200 C/392 F/Gas Mark 6.
  7. Line your baking pan with an aluminum foil and grease it with the help of a greasing brush.
  8. Place all the chicken pieces on the baking pan and spoon the marinade over all the pieces.
  9. Place the baking pan in to the middle rack of the oven and bake for 45-60 minutes depending on the size of the chicken pieces. Turn over the pieces half way through cooking.
  10. Once the chicken is cooked, all of the marinade dries but the chicken is still juicy, turn on the top grill of the oven and grill the chicken pieces for 8-10 minutes to give them that dark brown color.
  11. Take out of the oven, dish out and garnish with the onion rings.
  12. If wish to give the coal smoke to get that authentic barbecued flavor, aroma or the Tandoori effect, simply let the coal burn red hot over the stove. Once the Tikkas come out of the oven, put a piece of foil or stale bread in the middle of the Tikkas and place the burning hot coal piece on it with the help of a pair of tongs. Pour a drop or two of oil on that coal. Smoke will start releasing out of it. Cover the baking pan with a large lid or foil for a minute, NOT more than that. Uncover, take out the coal and the foil/bread piece and serve the Tikkas after garnishing.
  13. Serve hot with fresh Naan, Salad and Green Chutney or Mint Raitha (dip).
Serves 4-6


Ingredients needed

Pour marinade and oil over the chicken pieces
Marinated pieces

Ready to go in to the oven
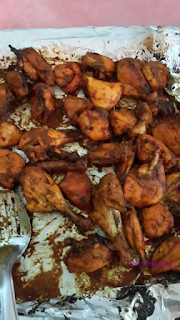
Baked Chicken fresh out of the oven :)


That's all barbecue fans! :) The spice level and the baking time can always be adjusted according to your taste buds and the type of your ovens. I hope you enjoy making and eating them. Until next time, keep sharing the goodness of this greatest blessing, that has been bestowed in abundance upon us the lucky ones, with the less fortunate ones.
Thank you and please remember in your Du'as/prayers! :)

*Not be duplicated, rewritten or published without permission- Thank you! 


Wednesday, May 13, 2015

Cook Unleashed is on Yummly!

I started posting on my blog more than two months now and to grow the audience, I have created different accounts on various networking sites like Facebook, Twitter and Pinterest. That has truly benefited my blog and Yummly is one of them too. Its a hub of all the recipes you are looking for and I literally mean all the recipes at one place that are just a click away.

Set up an account on Yummly and not only save recipes to your recipe box but you can also share your personal recipes there! therefore, you can very conveniently save my blog's recipes on your Yummly account and go back to them whenever you need to without any hassle.


So what are you waiting for, visit http://www.yummly.com/page/cookunleashed and get Unleashed by Yumming all my Blog's recipe posts! :D


Saturday, May 9, 2015

Victoria Sponge Sandwich Cake


The name suggests that it is a royal dessert, which it sure is and is said to be a favorite cake of Queen Victoria who fancied a slice of this cake with her afternoon tea, wow what luxury. But you don't need to be a royalty yourself to enjoy a slice (or two) of this delectable cake but can very much relish it in the comforts of a common-man's abode; you can easily make it at home as did I :D

To be honest with you, I didn't know about this cake until very recently or shall I say that I didn't know that the sandwiched cake we so merrily savored is actually known by the name of your very own Victoria Sponge. Upon knowing that, I thought why not to make it with more gusto and show off a bit that even we have a taste to devour, ah pardon me, have a penchant for some English treats, oh dear, how classy! (I've started to hear myself speak in British accent while typing these lines :P Thanks to my dearest friend A!)

On a more serious note, this cake is really very easy to make but you need to keep a few simple things in mind while preparing it to get the original classic texture and flavor of the Victoria Sponge. The guests can be effortlessly impressed by serving this cake at afternoon tea/Hi-tea or the friends will swoon at the sight of this cake layed at your Sunday brunch table. Lets get more classy by bringing it to the family picnics and enjoy this cake with the combination of gorgeous Spring/Summer time fruit, fresh strawberries along with the lusciousness of thick cream. Mmmm doesn't that all sound so tempting? It sure does!

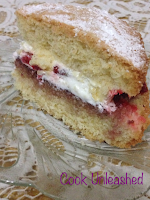
Traditionally raspberry or strawberry jam is used between the layers of this cake
The key to get the right, light-as-the-air texture of the sponge is to use Flour, eggs, sugar and butter in the same amount/weight and all the ingredients used should be at room temperature. Whenever you make your cake, muffins or any other type of cakes, always remember this tip to achieve best results. I use oil in my cakes though and never feel that the replacement does any compromise on the flavors but you can use butter by all means. You can also bake the layers into two cake moulds to get better results but I baked a single cake and then sliced it in to two layers as I have just one round mould (yeah, need to do some shopping soon to upgrade my baking supplies)

I reckon, this cake will become a family favorite easily and will surely become one of your most requested desserts. so get ready to hear 'Blimey, this is homemade?!' pretty soon! :D 
Oh, since this is an English dessert therefore I'd like to dedicate it to my very British friend, A! Hope you like it AYM! :D

Lets get Bonkers, or in other words, let some baking skills get unleashed today, cooks! :D


Victoria Sponge Sandwich Cake

Ingredients:
Eggs: 4 medium sized 
Butter/Oil: 250 gm/250 ml/1 cup
Caster Sugar: 250 gm/ 1 cup
Flour: 250 gm/ 2 cups
Baking Powder: 2 tsp
Vanilla Essence: 1 tsp
Salt: 1/4 tsp
Milk: 2 tbsp
Powdered or Icing/confectioner's sugar: for dusting over the cake
Whipping Cream: 200 ml
Fresh Strawberries: 1 cup (washed, hulled and sliced into halves)
Strawberry Preserves/Jam: 1/2 cup

Method:
  1. Prepare a 9 inch round cake tin by greasing and dusting it with flour or two 9 inch cake moulds. Preheat the oven at 180C/350F/Gas-Mark 4.
  2. Sift together the flour and the baking power and keep aside.
  3. Beat together the sugar and oil on high speed with the help of an electric beater or a whisk until well blended. If using butter then cream together both till pale in color. 
  4. Add  the eggs one at a time while beating for a few seconds after each addition. 
  5. Add salt and vanilla after the final addition of the eggs and beat lightly.
  6. Now add half of the flour and baking powder sifted together and beat for a few seconds on medium speed. DO NOT over beat or else the cake will go hard. repeat the same step with the rest of the flour.
  7. At this stage the cake batter should be dense enough to not drop easily if tried to drop with the help of a spatula or not runny that it gets of a flowy consistency but should make thick ribbon like shape upon dropping. If not, then add 2 tbsp of milk. Otherwise omit adding it altogether.
  8. Pour the batter into the mould(s) and level it with a help of a spatula for an even baking and rising.
  9. Bake into a preheated oven for 25-30 mins or till the cake(s) turn golden brown from the top, springs back upon lightly pressing into the middle or a tester inserted into the center of the cake comes out clean.
  10. Let the cake(s) cool down a bit before unmoulding it (them) onto a wire cooling rack.
  11. Let cool completely before slicing the cake into layers (if using one cake) and assembling.  
Assembling the cake:

  1. Slice the cake into two layers if you've baked one cake otherwise place one cake layer onto the cake stand or a serving platter to make things easier for you.
  2. Spread the preserves/jam over the the first layer. If using preserves then mash the fruit chunks with the help of a fork to smooth down it a little.
  3. Whip cream to soft peaks. You can add some sugar to sweeten the cream a bit if desired. Put dollops of the whipped cream over the jam layer. Try not to spread it as it will spread out on its own after the second cake layer is placed on the top.
  4. Place the strawberry halves all over the cake in a decorative way so that they can be seen placed between the layers.
  5. Put the rest of the cream over the strawberries and place the second cake layer on top.
  6. Put some powdered or icing sugar in a sifter and sprinkle all over the cake.
  7. Serve and enjoy with your friends and family.
Serves 8-10


Beat sugar and oil together

Add egg and vanilla


Add eggs one at a time

Beat gently after each addition


Add flour


Gently beat in all the flour


Prepare the mould
Pour in the batter

Bake till done

Cut when cools down

Layers

Use chilled cream

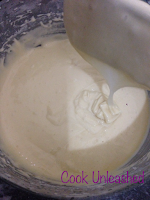
Beat till stiff peaks forms

Cut the strawberries

Homemade preserves

Spread over the 1st layer

Top with the whipped cream

Place strawberries

Some more

Put the 'lid' on
Dust icing sugar

Cut a huge slice

Enjoy! :D

That's all cake lovers! :) Baking time can always be adjusted according to the type of your ovens. I hope you enjoy making and eating them. Until next time, keep sharing the goodness of this greatest blessing, that has been bestowed in abundance upon us the lucky ones, with the less fortunate ones.
Thank you and please remember in your Du'as/prayers! :)

*Not be duplicated, rewritten or published without permission- Thank you!