Tuesday, March 24, 2015

Wholewheat Banana Crumble Muffins

Muffin is a healthy version of a cupcake; I'd say that's the only difference I find in between the two. I might be wrong but I have always made them as a healthier alternative of cupcakes and that also with wholewheat, thus I like to say that's the only major difference I see.

They're moist as well plus you can add any fruit (fresh/frozen) in the batter, less fat, sugar and egg than the regular cupcakes (hmm sounds good), do not need a mixer or no beating involved (now that's getting better) and also no need to worry if you've ran out of paper liners/cases. You can directly spoon the batter into the greased and floured muffin tray and in they go to get baked, yaay! Bonus point: they can be served warm therefore, no point waiting till these goodies cool down and your patience is about to go unleashed :P gobble them down with a hot cuppa and you're good to go. Oh and an extra bonus point: we're making them with the wholewheat flour without compromising on the flavors, yipee! :D

Fresh muffins, just out of the oven

Muffin is one of my most favorite treats not just for breakfast but for snacking too. As a kid, my Mom used to give us a muffin with a glass of cold milk as an evening snack and also, it was one of my school lunchbox's items. They used to be bakery bought that my Dad would bring for us along with other delicious treats from our favorite bakery, Saghar in the K.S.A on his way back from work :) A sandwich, one fruit and one little treat with a pack of Saudi Haleeb milk or a pouch of Capri Sun or a box of Suntop juice in my red lunchbox that had Sesame Street characters printed on it, was my real treasure. I'd save the treat to eat in the bus on my way back home after school ended and it really comforted my hunger pangs temporarily while on the 45 min commute back home.


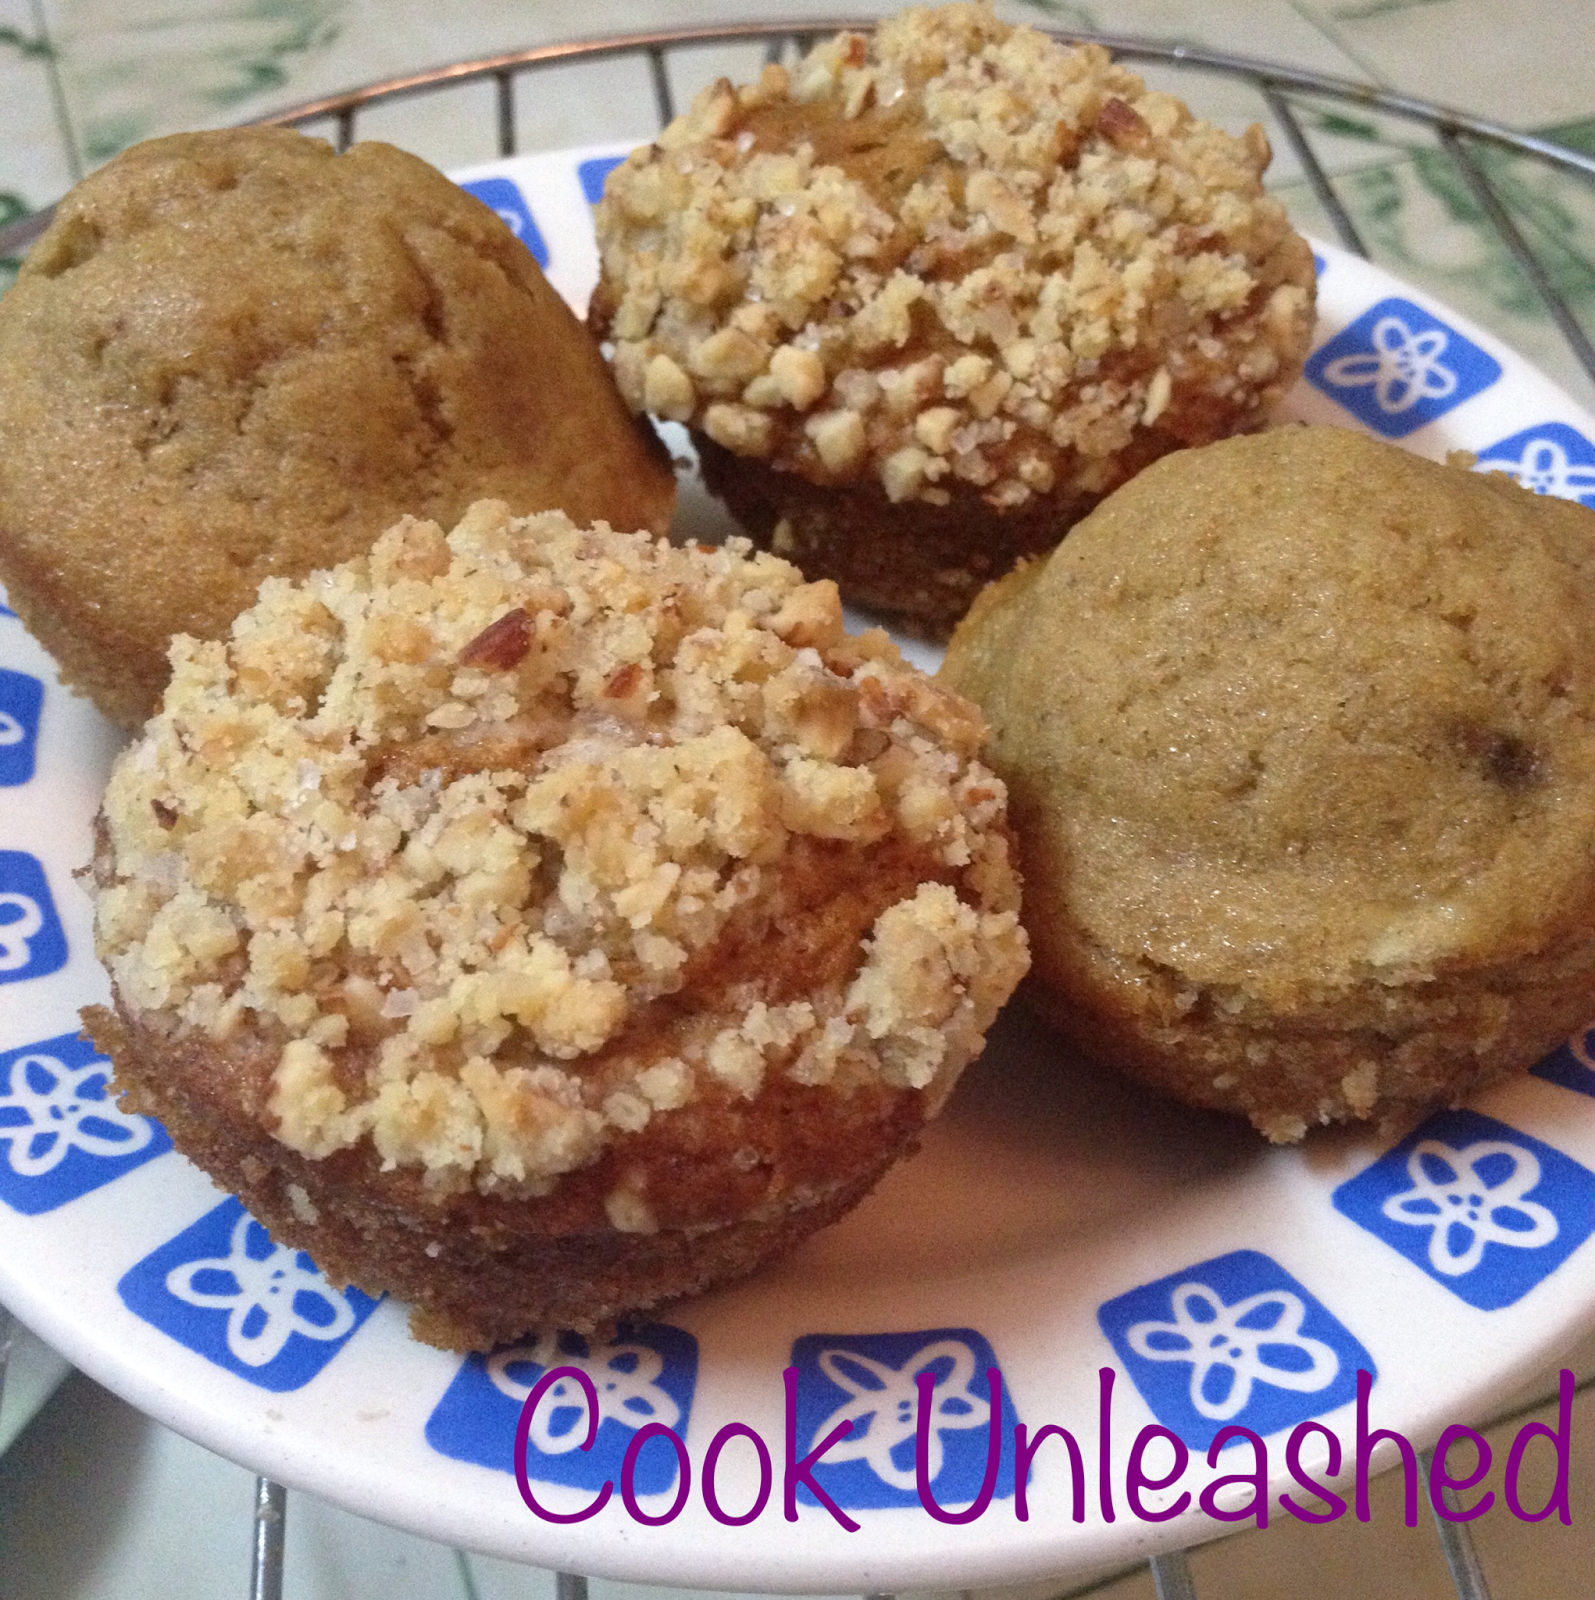
You can even make without the crumble top

Coming back from the memory lane :) as I grew up and got better at baking, a bit more adventurous and a little health conscious, I thought of making them at home with whatever experimenting of the flavors I could think of and used wholewheat flour instead of the regular all-purpose one. Not only me, but everyone who had them and is a fan of my baking, loved them! :D one of those many experiments is Banana Muffins and I also made wholewheat Chocolate Muffins (another upcoming post) I then tried to be a little more adventurous and made these muffins more fancy by adding the crumble on top. To give this crumble muffins a breakfasty touch, I then added some rolled oats in the topping. Exibit-a, here you're reading a post on them, Ta Da!

Get ready to unleash some of the baking aroma in your kitchen, Cooks! :D


Wholewheat Banana Crumble Muffins

Ingredients:

Wholewheat Flour: 2 cups
Bananas: 3 (large, ripe and mashed. Add 2,3 drops of lemon juice to prevent browning) 
Egg: 1
Brown Sugar: 3/4 cup (you can use white too or use half white and half brown) 
Vegetable Oil: 1/2 cup (can use Olive oil or even butter if you like) 
Butter Milk: 1/4 cup (or take 1/4 cup milk at room temp, add half a tsp of white vinegar and let it stand covered for a few minutes before using)
Baking Powder: 1 tsp.
Baking Soda: 1 tsp.
Salt: 1/4 tsp.
Cinnamon Powder: 1 tsp.
Sultanas/Raisins: 1/4 cup (optional) 

Topping:
Flour: 2 tbsp.
Rolled Oats: 2 tbsp.
Brown Sugar: 1/3 cup
Chopped Nuts: 1/3 cup (any of your choice, can use desiccated coconut too)
Cinnamon Powder: 1 tsp.
Butter: 2 tbsp. (cold)

Method:
  1. Grease and flour a 12 cup muffin pan and preheat the oven at 180 C/350 F/Gas-mark 4. 
  2. In a clean and dry bowl, mix all the dry ingredients like flour, baking powder, baking soda, sugar, salt, sultanas and cinnamon powder. Keep aside.
  3. In another bowl, lightly whisk an egg with the oil/butter and the butter milk. Add the mashed bananas.
  4. Now lightly fold all of the dry ingredients into this wet mixture. DO NOT beat or the muffins will become hard. Just fold gently until the mixture gets wet. Do not worry if its still lumpy 
  5. Mix all the dry topping ingredients and cut the cold butter into them. Mix with the help of your finger tips till the mixture resembles bread crumbs. Keep aside.
  6. Spoon the batter into the muffin cups, do not over fill. Just fill 3/4 of the cup.
  7. Sprinkle the topping on all of the muffins.
  8. Bake in a pre-heated oven for 30-35 mins or till the tops are golden brown and the tester inserted into the center of the muffins come out clean.
  9. Let stand for 10 mins before removing the muffins to cool on a wire rack.
  10. Serve warm or at room temp. with tea/coffee/milk.

      Makes 12

That's all, fellow bakers! :) Baking time can always be adjusted according to the type of your ovens. I hope you enjoy making and eating them. Until next time, keep sharing the goodness of this greatest blessing, that has been bestowed in abundance upon us the lucky ones, with the less fortunate ones.
Thank you and please remember in your Du'as/prayers! :)

*Not be duplicated, rewritten or published without permission- Thank you! 


Saturday, March 21, 2015

Strawberry-Banana Frozen Yogurt

Frozen yogurt topped with crushed Oreos and fresh strawberries

I love frozen yogurt! I can eat it at any time of the day whether its chilling cold or intense heat; I never get bored of eating it :D just like now, I'm typing these words and this big bowl of strawberry-banana frozen yogurt is right in front of me that I eat a spoonful of every now and then and might end up getting a brain freeze! (hope not) 

I got introduced to frozen yogurt or froyo during my stay in America. When I first heard about it, I thought yogurt and frozen?! How would that taste like?! And I'm glad I tasted and found it oh-so-yummy!

My first experience of having it was from TCBY while my cousin and I were out shopping and it was snowing. We got two flavors each but the most fun part was the choice of assorted toppings! Since it was a small store at the mall that's why they didn't have a lot of flavors and topping options but we chose some and really enjoyed while the specks of soft cotton like snow fell on our faces; it was one hell of an experience!


But it was frozen yogurt from Red Mango that got me hooked on it! and by far its my most favorite. I tried their various flavors but mostly enjoyed mango and pomegranate and liked best. The choice of toppings is always the most fun part as to create your custom cup and then deciding what to add as a topping to your yogurt and what not sure is quite challenging (hehe) 

You can add fresh fruit, candy, cookies, cereal, granola, cookie dough, nuts, chocolate chips, peanut butter chips, Bobas (tiny beads filled with fruit juice) cake crumb, sprinkles and what not. The choice is yours and the options are unlimited.

Mine is always overflowing with toppings :D

After coming back to the country I was surprised to find out that some international frozen yogurt franchises are now opened here too including Red Mango! but after trying out each one of them I was utterly disappointed as the flavors were nowhere close to what I have had in The US and of course, the quality wasn't the same. I decided to try my hand at making it at home by following the memory of what my palate was used to of eating and it turned out to be a success! I came up with making Strawberry-Banana frozen yogurt and also Mango (Check out my Mango & Coconut Frozen Yogurt recipe here) and prefer making it at home now with whatever fruit flavor I can experiment with and its not only fun to make but very healthy and pocket friendly as well.


                                                        My 1st attempt at making Strawberry-Banana Frozen yogurt


Very beautiful and fresh Strawberries are available now-a-days as they're in season but you can always make it with the frozen ones and can even freeze the bananas! Next time your bananas are about to go over-ripe just pop them into the freezer to make Strawberry-Banana frozen yogurt later or make Banana Bread right away :D (shall do a post on it soon)
 My fellow cooks, let the love of Frozen Yogurt get unleashed! :D


Strawberry-Banana Frozen Yogurt

Ingredients:

Unsweetened Plain Yogurt: 2 cups (thick and preferably homemade. Greek yogurt can be used too) 
Fresh/Frozen Strawberries: 1 cup (washed and hulled)
Ripe Bananas: 2 (large)
Sugar: 1/2 cup (you can use more but frozen yogurt is best enjoyed with a bit of tang)
Fresh lemon juice: 1 tsp. 
Sliced strawberries, crushed Oreos or any other topping of your choice and as much as you desire. Fresh Mint Leaves: (optional) for garnishing

Method:
  1. Purée the fruit along with the lemon juice and sugar without using any water.
  2. Beat the yogurt well with the help of a whisk.
  3. Add the puréed fruit to it, mix well, transfer the prepared yogurt to an airtight freezer-safe box and put it into the freezer. 
  4. Once it's half frozen, take out and blitz it with the help of a hand held blender or regular blender till smooth and no ice crystals remains.
     
  5. Pour it back into the box and freeze till it's set. 
  6. Ready to go back into the freezer


  7. Scoop out into the serving bowls/cups, garnish and serve with your favorite toppings.
Serves: 4

That's all guys! :) the amount of ingredients can always be adjusted according to your taste and desire. I hope you enjoy making and having it. Until next time, keep sharing the goodness of this greatest blessing, that has been bestowed in abundance upon us the lucky ones, with the less fortunate ones.
Thank you and please remember in your Du'as/prayers! :)

*Not be duplicated, rewritten or published without permission- Thank you! 


Wednesday, March 18, 2015

Chinese Orange Chicken (authentic P.F Chang's, in my own style) with Egg-Vegetable Fried Rice


Rice, Chicken and then Chinese, the combination of these three is enough to get me hooked on it! :D I'm passionately addicted to rice and Chinese is one of my favorite cuisines plus, anything with chicken is delicious! well that last bit is not entirely true; let me rephrase it, anything with chicken cooked well is delicious esp Biryani! :D (spicy chicken gravy layered with half-cooked aromatic rice and then cooked together- shall do a post on it soon, In Sha Allah (God Willing))
Lets not get distracted now! So coming back to the combination of my favorite ingredients in a Chinese way. I've literally grown up eating Chinese rice that my Mom so well makes. She not only adds some seasonal vegetables and eggs to it but tiny meat balls as well (another post promised) Oh, how I still drool over the memory of that luscious goodness of rice that doesn't need any gravy with it and is so del-i-ci-ous on its own! Should ask my Mom to make them soon and then share with you all (virtually) to see that what an amazing cook she is 'too'! (hehe :P)
Egg-Veggies Fried Rice prepared with leftover rice and some cooked and shredded chicken


Once I got into cooking, whenever I cooked Chinese, had always made Manchurian or Shashlik with the fried rice. During my stay in The U.S.A, I got introduced to various Chinese dishes as I got the experience of eating from different eateries that specialized in Oriental cuisine including Panda Express, P.F Chang's, Noodle & Company and Pei Wei Asian Diner etc but the options there were limited for me cause of their Chicken/Beef dishes not being Halal (meat slaughtered and prepared according to Islamic law) Therefore, I used to opt for seafood (shrimps/fish) dishes while my friends would indulge themselves into chicken ones and Orange Chicken was one of them. 

Since I've never had Orange Chicken in my life before at that time and forgive my ignorance, but never even had heard of it before that's why I was quite curious to know that how this glossy, tangy and spicy looking dish tasted. One of my friends then shared this recipe of the Orange Chicken which is served at P.F Chang's and is truly an authentic recipe but I recreated it with a bit of my own personal touch :)
The spicy and citrusy, battered white chicken cubes are deep fried and then added to this, sweet, zesty, hot orange sauce which is not only so easy to make but also very quick too. You can literally cook it under 30 minutes and if you have leftover or pre-boiled and cooled rice on hand, a wonderful meal is prepared under an hour and ready to be served! isn't that great? :D 

Now, you can easily make it at home and do not have to worry about not being able to eat at these non-Halal places anymore. But that doesn't mean those who can, shouldn't try making it at home. In fact they should to believe that how similar it is to the original and is economical too :)

Cooks, let the love of Chinese get Unleashed! :D


Chinese Orange Chicken

Ingredients:
Chicken (breast fillets): 4 (skinless and cut into small cubes)
Salt: 1 tsp
Garlic Powder: 2 tsp.
Ginger Powder: 1 tsp.
Onion Powder: 2 tsp.
Black Pepper: 2 tsp.
Red Chili Powder: 1 tsp (decrease for less heat)
Creole Seasoning*: 2 tsp
Orange Zest: 1 tsp. (grated) 
White Vinegar: 1 tbsp.
Soy Sauce: 1 tbsp.
All-Purpose Flour: 1/2 cup
Cornflour/Starch: 1/4 cup
Egg: 1 (beaten)
Vegetable/Canola/Corn/Sunflower Oil: for deep frying

For the sauce:

Orange Juice: 1 cup/250 ml (fresh or packaged) 
Chicken Stock: 1 cup/250 ml (make with bones or use a stock cube)
Tomato Ketchup: 1 cup (chili-garlic sauce can be used instead)
Chili Paste: 1 tsp. (if using chili-garlic sauce then omit adding it)
Brown Sugar: 2 tbsp.
Soy Sauce: 1 tbsp.
Sriracha Sauce: 1 tbsp.
Black Pepper: 1 tsp.
Salt: 1/2 tsp.
Garlic: 1 tbsp (finely chopped)
Ginger: 1 tbsp (finely chopped)
Orange Zest: 1 tsp (grated)
Vegetable/Canola/Corn/Sunflower Oil: 2 tbsp.
Cornflour/Starch: 2,3 tbsp (dissolved in 1/4 cup of water at room temp.)
Sesame Seeds: 1 tbsp. (for garnishing)
Spring Onion: 1 stalk (green part only, for garnishing)

Method:
  1. Add all the seasonings to the chicken cubes along with the orange zest, vinegar and soy sauce. let them marinate for a few minutes.
  2. Now add the beaten egg, all-purpose flour and corn flour/starch to the cubes and toss them so that all the cubes are well coated.
  3. Heat oil in a wok and deep fry the chicken cubes in batches over low-medium heat till crisp, golden brown and cooked through.
  4. Take them out on a kitchen towel lined platter with the help of a slotted spoon and keep aside.
  5. In another pot, heat 2 tbsp. of oil and saute' chopped ginger, garlic and grated orange zest in it for a minute.
  6. Add all the liquids, seasonings and brown sugar to them and let it come to a boil.
  7. Once boils, lower the heat and add the fried chicken pieces.
  8. Now pour the dissolved corn flour/starch to thicken the sauce.
  9. Cook till the sauce thickens and coats all of the chicken pieces.
  10. Serve immediately with/over plain/fried rice garnished with sesame seeds and chopped green onion stalks. 

Add fried chicken pieces only at the time of serving. Preps can be done beforehand though. Prepared Orange Sauce (without cornflour/starch added) can be made ahead and kept refrigerated for several days) The original dish is cooked a bit on the dry side but I like to have a little gravy on my rice hence, I increase the amount of liquids when I cook but I've shared the original amounts here. 

*Creole seasoning is a blend of different seasonings and spices and is used to season any kind of meat, rice, vegetables, soups, stews e.t.c. since it is not available everywhere therefore, you can easily make it at home.
Just blend together 2 tbsp. of Onion Powder, 2 tsp. of Garlic Powder, 2 tbsp. Dried Oregano, 2 tbsp. Dried Basil, 1 tbsp. Dried Thyme, 1 tbsp Black Pepper, 1 tbsp. White Pepper, 1 tbsp Cayenne Pepper, 5 Tbsp. Paprika, 3 tbsp. Salt and put everything in an airtight jar.
(recipe adapted from allrecipes.com)


Egg-Vegetable Fried Rice

Ingredients:
White Rice: 2 cups (boiled and cooled down completely. Leftover rice can be used too)
Cabbage: 1/2 cup (shredded) 
Bell Pepper/Capsicum: 1/2 cup (chopped)
Carrots: 1/2 cup (grated or chopped)
Peas: 1/2 cup (boiled)
Or use any seasonal/frozen vegetables of your choice.Eggs: 4 
Garlic: 1 tbsp. (finely chopped)
Soy Sauce: 3,4 tbsp.
Salt: 1 1/2 tbsp.
Pepper: 1 1/2 tbsp.
Oil: 1/4 cup+2 tsp. 

Method
  1. Crack eggs into a bowl, add 1/2 tsp. of salt and 1/2 tsp. of pepper, beat well with the help of a egg whisk/fork.
  2. Heat a tsp. of oil in a frying pan (lesser oil can be used, if using non-stick pan) and pour some of the beaten eggs into the hot frying pan. Cook from both the side like you'd cook an omelette or simply scramble the eggs as soon as they start to set a bit. 
  3. Break them into small pieces if cooking like scrambled eggs and let them cook completely. If cooked like an omelette, then take out into a plate, roll and cut into strips. Cook rest of the eggs by using other 1 tsp of oil and Keep aside.
  4. In a wok or large pot, heat oil and saute' garlic till the aroma releases.
  5. Add carrots and stir-fry them for a min. Now add rest of the vegetables, mix and stir fry for another minute or two over high heat.
  6. Add, seasonings, soy sauce, fried eggs and mix well.
  7. Now slowly add rice to the rest of the ingredients that are cooking and mix well.
  8. Lower the heat and keep mixing till all of the rice, vegetables and eggs are well combined and rice are heated through. 
  9. Cover and let stand for a few minutes before serving so that all of the flavors are well infused into the rice.
  10. Serve with Orange Chicken or any gravy of your choice (I'll be sharing more recipes of Chinese gravies in my upcoming posts) or eat on its own (will still taste divine! trust me :D)

    Cooked shredded/pieces of chicken can be added too to make it a full meal to have it on its own.

    Serves: 4-6

That's all friends! :) the amount of ingredients and seasonings can always be adjusted according to your taste and desire. I hope you enjoy making and having it. Until next time, keep sharing the goodness of this greatest blessing, that has been bestowed in abundance upon us the lucky ones, with the less fortunate ones.
Thank you and please remember in your Du'as/prayers! :)

*Not be duplicated, rewritten or published without permission- Thank you! 


Monday, March 16, 2015

Gajjer Ka Halwa


Gajjer Ka Halwa is a dessert/pudding cooked with carrots and milk. Ghee (clarified butter), Khoya (milk solids) and nuts are added for extra richness that's why this scrumptious and grand dessert is known as one of the winter specialties but can be enjoyed at any time of the year. 
Because of living abroad most of the life, we were deprived of finding Pakistani carrots in abundance but my Dad used to get them as a delicacy from the local vegetable market once they were in season and imported. My mother used to make Gajjer Ka Halwa and Gajjeriala (carrot and rice pudding- you will find the recipe of it in my upcoming posts) with those fresh, red, juicy and crunchy carrots that we enjoyed thoroughly. But that doesn't mean that you cannot make this Halwa with any other kind of carrots; you definitely can by all means and shouldn't miss a chance of enjoying this delectable dessert at all! Have it with Chai/tea or Kashmiri Sabz Chai; the combo is simply matchless! :D

Gajjer Ka Halwa and Chai is a lovely combo
Since its a rich dessert that's why for its magnificence, Gajjer Ka Halwa is served at feasts and traditional weddings in Pakistan and India. The exuberance of it is then enhanced by adding assorted nuts and extra Khoya along with hard boiled sliced eggs. I'm not a fan of eggs in my Halwa that's why I never add them but those who like it, say that it enhances the flavors; nothings wrong with experimenting with your palate so maybe someday I'd be brave enough to try it too :D


Khoya (milk solids)

Khoya is an important ingredient of this Halwa which is made by thickening full fat fresh milk over low heat. This is a very long and tedious process that's why people prefer getting it from the milk shops and Halwais (confectioners). But most of the shops make it by using dried whole milk (powder) now-a-days to make things easier for them too. That's why at the places where there is no availability of Khoya possible, it can be easily made at home by using milk powder. I myself had tried experimenting with the Khoya making at home and have managed to come up with some easy and quick alternatives. I shall do a post on them in future, In Sha Allah (God Willing) I have also seen some people making it with Ricotta Cheese as it is similar to Khoya but has less moisture content and can be used as a substitute. 


Halwa cooked without Khoya

But if you do not bother to have it with Khoya, then milk powder can even be directly added to the cooked Halwa as an alternative or just to make life easier, don't add any Khoya/milk powder at all and have it on its own. Believe me, it would still taste delicious and look tempting and would be a little less on the calories as well (calorie part is just to comfort the guilty conscious :P) 

As the Spring is still taking time to arrive so, lets take full advantage of this opportunity by making Gajjer Ka Halwa, fellow Cooks! Let that Dessert Craving get Unleashed! :D

P.S: while I'm jotting down this recipe, my first attempt at making Whole-wheat Cake Rusks just came out of the oven and guess what? you can never tell they're not made with all-purpose flour! allow me to say it myself that they are way better than bakery bought as well, yaay! :D this deserves a pat on the back! :D (cant stop grinning, yeah I know). Will share the recipe after I'm done sharing some of the seasonal treats, In Sha Allah :D 


Gajjer Ka Halwa

Ingredients:

Carrots: (washed, peeled, tops and ends removed and grated) 2 Kg/4.40 lbs
Sugar: 1 cup or according to the taste.
Full Fat Milk: 2 cups/500 ml
Ghee/Oil: 1 cup
Khoya: 250 gms (if using milk powder then use 1 cup of it)
Green Cardamoms: 6-8 pods
Chopped mixed nuts: (almonds (peeled), pistachios, cashews, walnuts) for garnishing.
Eggs: (hard boiled) for garnishing (optional)

Method:

  1. Put the grated carrots and milk into a heavy-based pot and let them cook over medium heat till the milk dries a little.
  2. Add sugar and mix well. Once sugar melts, it will release moisture. Cook till all the moisture evaporates and carrots are softened and cooked through.
  3. Add ghee/oil, green cardamoms and cook again over medium flame for a few minutes or till the ghee/oil added releases a little. This process is called Bhoonai.
  4. Lower the flame to the lowest and add Khoya (reserve some for garnishing)/milk powder to the Halwa, mix well and let it simmer for a few minutes.
  5. Turn off the flame. Take out into a serving bowl. Garnish with the reserved Khoya (if using) chopped nuts and boiled eggs slices (optional). Serve hot/warm, ideally with Kashmiri Sabz Chai.
       Serves 4-6

That's all my dear followers! :) The amount of sugar and the quantity of Khoya or milk powder can always be adjusted according to your taste and desire. I hope you enjoy making and having it. Until next time, keep sharing the goodness of this greatest blessing, that has been bestowed in abundance upon us the lucky ones, with the less fortunate ones.

Thank you and please remember in your Du'as/prayers! :)

*Not be duplicated, rewritten or published without permission- Thank you! 


Sunday, March 15, 2015

Kashmeri Sabz Chai- Pink Tea


Kashmiri Sabz Chai- a traditional beverage from Kashmir region which is pink in color but is made by brewing dried tea leaves. The leaves are dark green in color hence the name Sabz (green in Urdu) Chai (tea in Urdu)
You know winters are here when this tea is brewed in a Kashmiri household. Aromatic Kashmiri 'Sabz chai', laced with powdered/crushed nuts is a popular hot beverage that we never run out of at ours the entire winter season. A wholesome breakfast accompaniment to soak buttery Baaqer Khaani (flaky puff pastry baked in a Tandoor- large clay oven) in it and devouring or leisurely sipping it with dry fruits, nuts while toasting in front of the heater. Dunking your Naan Khataai in this pink goodness as a teatime snack or serving it along with Gajjer ka Halwa to the guests. A beverage served at the weddings to enhance the grandeur of the festivities or just to have it as a wonderful way to end any meal; you name it and the delicious options are endless. 
Being a Kashmiri myself, I've always seen this tea being not only enjoyed during winters but served to the guests as well. Its traditionally served salty but some people like having it sweet. We've always liked it saltish but you can keep the sugar pot along with the cups for those who'd like having a bit of sweetness in their Sabz Chai. For extra richness, some people like to top their cup of Sabz Chai with some Malai (fresh/clotted cream) but its a personal choice, not a must and I like it sans Malai.


My mother is a Pathan but my late Nani Ma Jee (maternal grandmother) was a Kashmiri therefore, she had seen her making this tea since her childhood. Unfortunately, I didn't get a chance to witness that myself but I have seen my mother making it all my life. If you are a regular follower of my blog then you must be familiar with my obsession with tea by now. That's why for the love of tea, it was impossible that I wouldn't have had learnt making this palatable beverage :D besides, making this tea is like a must-know art in our family and Alhumdulilah (Thank God), we never go wrong with obtaining that 'tea pink' color of the Kehwa (brewed tea)
There are some rules, technicalities and careful attention required in successfully making this tea but once you get hold of them, you can never go wrong again. Plus, the bonus point of going through the 'hassle' is that you can referigerate the prepared and strained Kehwa in an airtight glass bottle to enjoy a cuppa up till a week! isn't it great? Yes, I know, it's awesome! :D

So shall we begin with the steps? Cooks, let the 'Chai lover' in you get unleashed! :D


Kashmiri Sabz Chai- Pink Tea

Ingredients:

Water: (at room temperature) 3 cups
Water: (cold) 2 cups
Kashmiri green tea leaves :(any good quality brand. See below for the picture) 1 tbsp., heaping full. 
Star Anis: 2 pieces
Green Cardamoms: 4 pods
Salt: 2 tsp or according to taste
Sugar: according to taste (optional)
Full fat Milk: 2 cups/500 ml
Chopped/Crushed/powdered nuts: for garnishing

Malai (Fresh/clotted Cream): for garnishing (optional)
Method:
  1. In a heavy bottomed pot, add tea leaves, 1 star anise, 2 green cardamom pods, 1 tsp salt along with 3 cups of water (at room temp)
  2. Bring to a boil over high flame. Reduce the flame and let it simmer for 30 minutes or till the quantity reduces to the half of it.
  3. Turn off the flame and add remaining 2 cups of the water (cold) to the boiled Kehwa 
  4. Take some Kehwa in a ladle and pour it back into the rest of the prepared Kehwa from some height (as shown in the picture) this way, air will oxidize the brewed tea and it will gradually turn into reddish color. This process is called 'Phaintna'- beating. Repeat the process a couple of times to obtain the rich, vibrant color. 


5. Put the pot back on a medium flame, bring it to a boil and let it simmer for 2,3 minutes. Strain the Kehwa and keep aside.
6. Pour the milk in another heavy-based pot, put the remaining salt, star anise, cardamoms and bring it to a boil.
7. Add about 1-2 cups of the brewed Kehwa to the milk, depending on the desired richness and color of the Chai.
8. Let the Chai boil and then simmer on a low flame for 4-5 minutes.
9. Now pour into cups, sprinkle some nuts on top and serve piping hot along with sugar for those who'd like it sweet. Add a dollop of Malai on top, if using.
Serves 3-4


Remaining Kehwa can be stored in a glass bottle. Can stay good refrigerated up till a week.


Tips:

1. Always use water at room-temperature for perfect Kehwa
2. If you feel that the desired color is not obtained then while the Kehwa boils, add a pinch of Bi-Carbonate of Soda to it before doing the cold water step.
3. Cardamom stick can be used instead of star anise but traditionally, star anise is added.
4. Always store the Kehwa strained and in an air-tight glass jar. Keep it refrigerated. If you have added Bi-Carbonate of Soda, then better to consume it within a day or two as it may change in color if kept for long.
5. We use Tapal brand but you can use any good quality brand of 'Keshmiri Green Tea' leaves. Avoid using the loose tea leaves without any label that's commonly sold at any retail/spice shop.


That's all my dear readers! :) The amount of salt, sugar and the quantity of Kehwa and milk can always be adjusted according to your taste and desire. I hope you enjoy making and having it. Until next time, keep sharing the goodness of this greatest blessing, that has been bestowed in abundance upon us the lucky ones, with the less fortunate ones.
Thank you and please remember in your Du'as/prayers! :)

*Not be duplicated, rewritten or published without permission- Thank you! 


Wednesday, March 11, 2015

Naan Khataai- Desi Sugar Cookies


I'm entirely in love with these soft, buttery, sugary, aromatic, melt-in-your-mouth cookies! They're known to be a winter's delicacy for their richness but you can enjoy them all year round. The memory of tasting them for the first time goes back to me as a little girl on a visit to Pakistan during winters. A tea-time spread was prepared for some guests at my Dadi Ma Jee's house (maternal grandmother) and along with Gajjer ka Halwa, hard boiled eggs; halved and sprinkled with salt grains and freshly ground black pepper powder, there was a plate of these Khatais as well but my Dadi Ma Jee called them Khand Kulchay (Khand is sugar in Punjabi and Kulchay is soft baked bread that's made in a Tandoor, a large clay oven) Those treats were served with Kashmiri Sabz Chai (a traditional tea from Kashmir region which is pink in color) and believe me, the flavor of these delectable goodies beautifully complements with Kashmiri Sabz Chai .
So back to the time I dunked that sweet Desi sugary treat into my lukewarm cup of Sabz chai; as I was a kid but totally obsessed with tea so a special favor was bestowed upon me by providing me with not a piping hot cup of tea :D besides, my love affair with tea started at a very young age and my mom should be blamed for it which she is guilty of doing and expresses her ruefulness about quite regularly :P
Anyway, the moment I gobbled down that sweet cookie, soaked in saltish Chai, I found it very pleasant! But I became an ardent lover of it no sooner than after becoming an adult, specially after I learnt to make these from a random cooking show coming on the national TV channel :) I did tweak it a bit so here I present to you my take on making these delights. You can say its one of my specialties that I do make a couple of times during winters and store them in an air-tight box, but that's another thing that they don't last long in there ;)


Ready to unleash the cooks? Here we go :D


Freshly baked Naan Khatais served with Sabz Chai 

Naan Khataai (Desi Sugar Cookies)

Ingredients:


Flour: 2 cups
Semolina: 1/2 cup
Powdered Sugar: 3/4 cup
Ghee (clarified butter): 3/4 cup
Green cardamom powder: 1/2 tsp
Baking powder: 1/2 tsp
Salt: 1/4 tsp
Egg: 1 (beaten)
Almonds or any nut of your choice: for garnishing

Method:


  1. Preheat the oven at 180C/350F/Gas mark 4. 
  2. Mix ghee and powdered sugar together till creamy (this step can be done in a food-processor) 
  3. Mix all the dry ingredients to the creamy mixture. 
  4. Pulse or knead with your hands till everything comes together and a dough is formed. 
  5. Take out in a dry bowl, knead for a few seconds and keep aside for a few minutes (preferably at a cool place) 
  6. Take a small portion of the dough, roll it into a smooth, crack-free ball and flatten it a bit like small cookies. 
  7. Place the prepared cookie on a baking tray/sheet. Prepare all the Khataais following the same way and place them on the baking tray/sheet by keeping a little space between all of them. 
  8. Make a small dimple/indentation in the middle of each Khataai with the help of your index finger and drop a little of the beaten each in each dimple/indentation
  9. If garnishing with any nut, simply brush the Khataais with beaten egg and place a nut on each of them.
  10. Bake in the preheated oven for 12-15 mins or till the egg turns golden brown. 
  11. Let them cool down a bit before removing from the tray. 
  12. Place on the wire rack to cool them completely. 
  13. Serve with Chai (tea).
  14. Can be stored for 7-10 days in an airtight container. Makes 18 approx


P.S: egg can be replaced with milk- just brush some milk on top of each khatai. 

That's all my dear readers! :) Baking time can always be adjusted according to the type of your ovens. I hope you enjoy making and eating them. Until next time, keep sharing the goodness of this greatest blessing, that has been bestowed in abundance upon us the lucky ones, with the less fortunate ones.
Thank you and please remember in your Du'as/prayers! :)

*Not be duplicated, rewritten or published without permission- Thank you! 


Kashmiri Sabz Chai